7 Common Mini Lathe Issues and How to Solve Them: Expert Guide and Solutions
Lathe machines are widely used and accepted all over industries and commercial grounds, and talking Mini Lathe/s, these are even used by a few households for petty work and errands.
In order to create a cylindrical shape, Lathes primarily turn, carve, cut, pierce, and perform other machine-related activities.
Due to its rigorous and rigid work profile, and being machinery as well, it gets worked up and might even face some major or minor issues. To overcome these problems, Here are some of the key solutions to get your Mini Lathe upgraded and ready for work!
Initially, we have jotted down the 7 common mini lathe issues , these include:-
- Metal lathe chattering
- Strange vibration from a wood lathe
- Carriage issue
- Trouble cutting the threads
- Defective metal cut
- Slipping tailstock
- Other miscellaneous issues
1. Metal Lathe Chattering: Possible Fixes
All machine operators must avoid chatter at all costs. It’s essential that you understand how to stop chatter on a lathe once it appears because it will inevitably occur. We’ll explain what chatter is, why it matters, and potential solutions in this article.
What is Lathe Chattering And How Does It Happen?
Chatter occurs when the lathe used to reshape the workpiece loses contact with the surface or is unable to do so. Instead, the lathe skips over the metal’s surface before reestablishing contact. Chatter, a restless, rotating noise, is produced as a result.
Chatter is an unavoidable outcome when the tool pressure is too high and the setup of your workpiece is not rigid enough. In order to stop the chatter, one of these two factors must be altered.
When machining some metals, clatter is more likely to occur; aluminum is renowned for having a high chatter rate.
Even if it’s only a beginner’s lathe, make sure you’re using the best one available. A high-quality tool will be constructed with high-quality components and have fewer chattering issues.
Ways to Prevent Lathe Chatter
Lathe chattering can be prevented by either raising the level of rigidity or by lowering the amount of tool pressure. These can be done by following methods:-
Ways to Raise Rigidity level
The first step to getting rid of noise from your lathe is to have a setup that is as solid and locked down as possible. You may secure your lathe setup by following these procedures.
a. Employ tail assistance:- This is by far the most straightforward approach to try if you’re not using the tailstock to help support your workpiece. The workpiece is steadily held by the tailstock, enhancing stiffness and reducing the likelihood of chatter-causing skipping.
b. Minimize the exposed material:- If at all possible, add more material to the clamp, chuck, or collet that is holding your work, or add more material to the bore in the headstock. The likelihood of the material shifting position decreases as the length of the exposed material increases.
c. Examine the tool post and compound:- Consider readjusting so that the two components are in line if your tool post is dangling over your compound. Or, to reduce vibration and improve the rigidity of your lathe setup, you can fully remove your compound if you’re not utilizing it for this particular lathe project.
d. Adjust spindle bearing tension:-Newer machines often don’t have this problem, but an older machine can have a loose spindle bearing or a loose component in the chuck. Check your spindle and tighten the bearings to see if that quiets your machine if you’ve tried everything else and are still hearing chatter.
Ways to Lower Tool Pressure
Once you’ve decided that your setup is solid enough, take a different approach to the issue by reducing tool pressure.
a. Your tool’s overhang should be reduced:- Just enough of the tool should be exposed to complete the task at hand.
b. Look for redundancy:- Using a dull tool bit increases the strain on the tool. Before using your tools, make sure they are sharp.
c. Consider a different device:- Although rounded-nosed tools typically produce a finer, smoother finish, they are also responsible for a significant amount of noise. Consider whether an instrument that is less rounded could produce the same outcomes.
2. Strange Vibration From a Wood Lathe: Some Tool Problems and Suggestions
The frustrations brought on by vibrations when turning the wood lathe machine have been felt by many owners of wood lathes. There are many different things that might produce vibration, here are some suggestions for lessening the issue.
- Incorrect blade sharpening – To cut the wood with dull or inadequately sharpened tools, greater force must be applied. The piece may shake if more force is applied to the wood. The surface of the wood bears “chatter” markings from these vibrations. Always keep your tools properly honed!
- Wrong turning stock mounting:-Even though it might seem self-explanatory, we wanted to address two crucial problems with regard to correct mounting. It goes without saying that keeping everything as level as possible when mounting can lessen vibration for side grain crafts like bowls and platters. Proper centering is crucial for spindle projects, but the amount of pressure applied to the wood between the headstock and tailstock also matters. This is particularly apparent in projects that are longer or thinner. The wood may actually bend along its length if there is too much power applied from the ends. Use just enough pressure to hold the wood in place, but not so much that it starts to bend.
- Incorrectly adjusted drive belts:- Drive belts that have not been correctly tightened can occasionally result in small vibration concerns, but they rarely create significant trouble. Overtightened belts can exert too much stress against the shaft that rotates the movable portion of the headstock, which will eventually result in the bearings failing early. Belts that are too tight can make things worse. Belt slippage while turning can result in the lathe speeding up and slowing down, especially at higher RPMs, which can produce excessive vibration. Check the owner’s handbook of your lathe for instructions on belt adjustment.
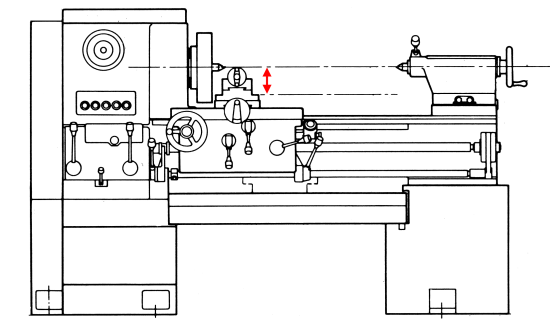
3. Carriage Issues
Your lathe machine may develop a “blocked carriage” over time. In order for the machine to move and function properly, both the carriage and the handles must be in excellent operating order.
Just a friendly reminder that regardless of whether it’s a little metal lathe or a large lathe, you must have a thorough understanding of the carriage system to identify the precise issue.
Fixing the problem:-
- Basically, the carriage includes different parts, including Toolpost, Compound rest, Cross slide, and saddle.
- Accordingly, Check to see which component of your machine is malfunctioning. The issue with your tool post is present if your cutting tools are not resting in a fixed position.
- In a similar manner, if the cutting tool has been adjusted but you are still unsteady, check the compound rest located beneath the tool post.
- Make sure all the assemblies are in good condition by disassembling the carriage. If the nuts are found to be loose, appropriately tighten them. Clean the grease off.
- Verify again that the compound rest’s surface is level.
4. Trouble Cutting the Threads
Often, at the amateur level, there are a lot of difficulties that many users face when they start cutting the threads through the lathes.
The hardest thing for a beginner is when you first start cutting them. When the knob is turned, the same inquiry will keep coming up, as well as why it occurs, etc.
Here are some tips and suggestions to follow while doing so, or before starting up the procedure.
Tips for setting up the lathe for Threading and cutting the threads:-
- You need a tidy, stable compound and toolpost. Before starting your project, double-check that. If that is a new lathe, everything ought to be OK.
- To choose the proper gear you need to cut the thread, always refer to the machine’s owner’s manual. Look in the book for the gear table.
- The threading tool should then be adjusted to the part’s diameter. It will serve as your initial depth.
- For the cross slide and the compound, the scale should be set to 0.
- Alternatively, if it’s your first build, start with metal. It will ease your life a little.
- Slow down the lathe’s rotation and begin cutting a scratch stroke. It goes without saying that you must first set a zero position.
- Any time you switch the tools at the conclusion of the cut, stop the process. To prevent harm, make the cut one at a time.
- After one scratch pass, use a thread scale to confirm the pitch once again.
- Clear the tool by moving the carriage backward. To trace the cutter back to its starting place, turn the lathe once more in the other direction.
- While pulling off the carriage, the tool won’t make contact with the material. then attempt the next pass.
- Reset the carriage’s scale to zero. The cross slide and the compound.
5. Defective Metal Cuts
You run the risk of making poor metal cuts if your lathe device has still not been mounted correctly or if you are not paying attention to the recommended tool height settings.
Your initiatives will be ruined, and you won’t ever be happy. The secret to flawless installation is to always achieve precise, flawless cuts.
Here are some possible flaws to check upon:-
- Short Bytes Are Prevented by Cutting the Depth
The level of engraving varies depending on the toll type, speed, metal kind, etc. Setting with a small value of chopping and enhancing subsequently produces better outcomes for deeper depth requirements. Therefore, choose machining with a moderate speed, a shallower depth, and a gradual rise in the supply of task portions.
- Incorrect tool placement
Damage to the dimension of slashing results from fixing the engraved device in an unenviable matchup with an unbalanced height balance. Fitting in the middle of the chuck is the suggested position since it will guarantee accurate cuts and prevent damage to the work items. To correct this, though, simply turn the lathe slowly enough that the chuck doesn’t rotate t
- Feed Rate for Material
The heavy setting begins to slow up the procedure and reduce machining quality. In these circumstances, the headstock disengages before it reaches the stop point. This error will be detectable by experts or trained operators. When starting with heavier settings, it is preferable to use a little quantity of hand feed, experiment with reversing the carriage, and then move on to the next phase. Another technique for precision metalworking is to check the dial with the use of a lock screw.
- Adjusting the speed of rotation
It is a condition that must be examined before feeding effort-producing substances. Although it can seem like a typical standard, it is strongly encouraged to make sure that material thickness, tool compatibility, and speed are.
- Problems with Lathe Operation
The lathe is a versatile piece of machinery that may be used for a variety of tasks, including cutting, turning, and deforming. Because there are many opportunities for errors to occur while performing a cutting activity, professional performance yields particular results in productivity. The mechanism of the faults varies depending on the type of material, such as wood or metal. Detecting errors through the noise
- Detecting errors through the noise
With the introduction of advanced lathe models like vibration-free, high-speed, etc., mistakes are still conceivable if the machinery is solely used by novice operators or in the incorrect substance feed position. However, there is indeed a clever tip that allows the novice to tactically understand wounded accidents: high sound produced while processing. The sound changes when there is excessive vibration or rotation, which may aid the operator in detecting processing flaws.
6. Slipping Tailstock
In a lathe for woodturning, it occurs frequently. While attempting to tighten the workpiece between the centers, you might notice that the tailstock is suddenly slipping.
This can occur even with a brand-new lathe if the tailstock is not correctly fixed before use. Before you begin chopping or rotating, firmly lock it down.
But if the lathe isn’t new, the issue can be inconvenient.
How To Fix This Problem?
Before beginning, make sure the screws holding the tailstock in place are snug on a new lathe. If they’re slack, make sure to tighten them up well. The mounted taper, which is the main offender, is examined first. Out-of-roundness or other obvious damage will be shown if the ID is tested with a taper gauge. Large gaps or extensive bluing are clear indications that the taper is compromised.
Next, we make sure the quill fits snugly in the housing and also that the taper seems concentric to it. We also check the bearing chambers for adequate size, quality, and concentricity if the tailstock has a revolving spindle and is a live tailstock.
7. Other Miscellaneous Issues
Apart from the major problems we’ve covered so far, there are some minor issues and a lot of them which can be of greater importance, some of them include:-
- When the device is turned on, neither the power supply nor any information is displayed.
Problem: Either the fuse is burned out or the power cord connection is incorrect. The signal line is unfastened or broken.
Fix: Check the power cable’s wiring, disassemble the electrical box, swap out the fuse, and make sure the power supply and the signal cord are connected properly.
- The workpiece has a significant local size mistake. The primary cause is an excessive gap between both the mother cable and the lead screw. The space in this region widens because of the wire mother as well as the screws running in this area for such a long time. The calculated screw clearance is corrected into the program at the beginning, but it cannot be corrected in the worn section, resulting in the out-of-tolerance local parameters of the workpiece. The screw needs to be fixed or changed.
- The stepper motor won’t move once the software has finished running.
This problem is typically brought on by the stepper motor’s control system or phase breakdown. Either the stepper motor’s drive circuit or the motor drive itself could be defective. First, make sure the stepper motor’s connection plug is making excellent contact. To check yet if the motor is functioning properly crew y, replace the motor if the connection is sound. After changing the motor, if the motor does not really operate normally, it is likely that the control component is malfunctioning. You should concentrate on inspecting the release diode for the protection element and the elevated transistor here on the driver board.
- Despite the invalid one-click button, the display is normal.
Problem: The click button’s tail wire is broken or short-circuited, and the click button itself is damaged.
Possible fix: Replace the push button and reattach the tail wire as a fix.
- The power motor did not run, however, the wood lathe could be turned on normally.
Problem: The heat relay has tripped, the fuses are burnt out, or the power source is out of phase.
Possible Fix: Replace the fuse, check your power wiring, and set the thermo relay as a solution.
- While operating, the woodworking tool stops in a single location, and the motor is vibration-free.
Problem: The control wire for the stepper motor is damaged.
Possible Fix: Reconnect the control wire as a solution. Check In particular to see if the control wiring board plug underneath the button controller is loose or coming loose. whether the stepping motor’s plug and wiring are loose or have fallen off.
- Massive vibration
Problem: The loading center point is incorrect. Turn the tailstock thimble, the middle of the center sleeve, and the thimble to blur.
Possible fix: Rotate the feeding rack in a different direction.
- The machine is caught in the middle of processing, and the engine is ringing strangely.
Problem: The largeness of the workpiece is a problem.
Possible fix: Replace the central sleeve as a solution. It is typical for the width of the central sleeve to be greater than 2mm and less than 2mm less than the lateral of the column. The drop will prevent the motor from operating.
- Regular changes occur in the ultimate product’s length and thickness.
Problem: Failure of the drive.
Possible Fix: Replace the driver as a solution. You can press the “Reset Zero” key once again and, after the standby mode has ended, carefully mark each axis to test the drive failure technique. Once the cycle has been executed several times, the location of the mark mismatch is checked each time; if there is a consistent change, the cycle might be deemed to have a driving fault.
- When it goes back to zero, the wooden lathe tool is not in the proper place.
It is typically brought on by the mechanical transmission system’s excessive resistance. The tool holder operates at a low speed and voltage during a cutting feed, and the stepping motor’s modest running torque is insufficient to address the resistance and results in wasted steps. The stepper motor is operated by voltage level, which has a high running speed, significant power, and no cutting resistance when it is returning to zero. No steps are lost by the stepper motor. In this method, losing steps while moving and returning regularly will result in the phenomena of non-return to zero.
Conclusion
So, these were some leading problems that we’ve discussed. Functioning of Lathes and Mini- Lathes tools are the work of people having greater expertise in the area, for having safer and user-friendly control over it, one should be aware of them and should be aware of how to properly use them.
Hope you find this article helpful and have a good experience with your machine!

Hi, my name is Charles Winn, A DIY enthusiast, Mechanical Engineer. I was born and raised in Springfield, Missouri. I am also a father of two troublemaker kids, a terrible photographer, and I love to play chess.